PRInfo Display Setup
Step-by-step guide for installing PRInfo prize/information displays at each location.
All 4 PRInfo displays use identical configuration. This guide covers one installation; repeat for each location. Multiply equipment quantities by 4 for the full deployment.
Display Locations
| Display | Location | Network Drop | Notes |
|---|---|---|---|
| PRInfo 1 | Prize & Info booth (Booth 191) | Wired Ethernet | GL-iNet KVM installed for remote access |
| PRInfo 2 | Swaps building (near rollup door) | Wireless AP | |
| PRInfo 3 | East Hall (near booth 21) | Wired Ethernet | |
| PRInfo 4 | West Hall (near booth 46) | Wired Ethernet |
System Components
| Component | Description |
|---|---|
| prinfo | Display client (Python/FastAPI) on Raspberry Pi |
| prinfo-api | Backend API (Cloudflare Worker) |
| prinfo-ansible | Deployment automation for Pi fleet |
| GL-iNet KVM | IP KVM for remote access to PRInfo 1 (Prize Info booth) |
What You’ll Need
Equipment
| Item | Qty | Notes |
|---|---|---|
| TCL 55” TV | 1 | On rolling stand |
| Raspberry Pi | 1 | Configured via Ansible |
| Power strip | 1 | Zip-tied to stand pole |
Tools
| Item | Notes |
|---|---|
| Zip ties | Securing Pi and cables to stand |
Materials / Consumables
| Item | Qty | Notes |
|---|---|---|
| HDMI cable | 1 | Pi to TV |
| Ethernet cable | 1 | If wired network available |
| Extension cord | 1 | Length varies by location |
Setup
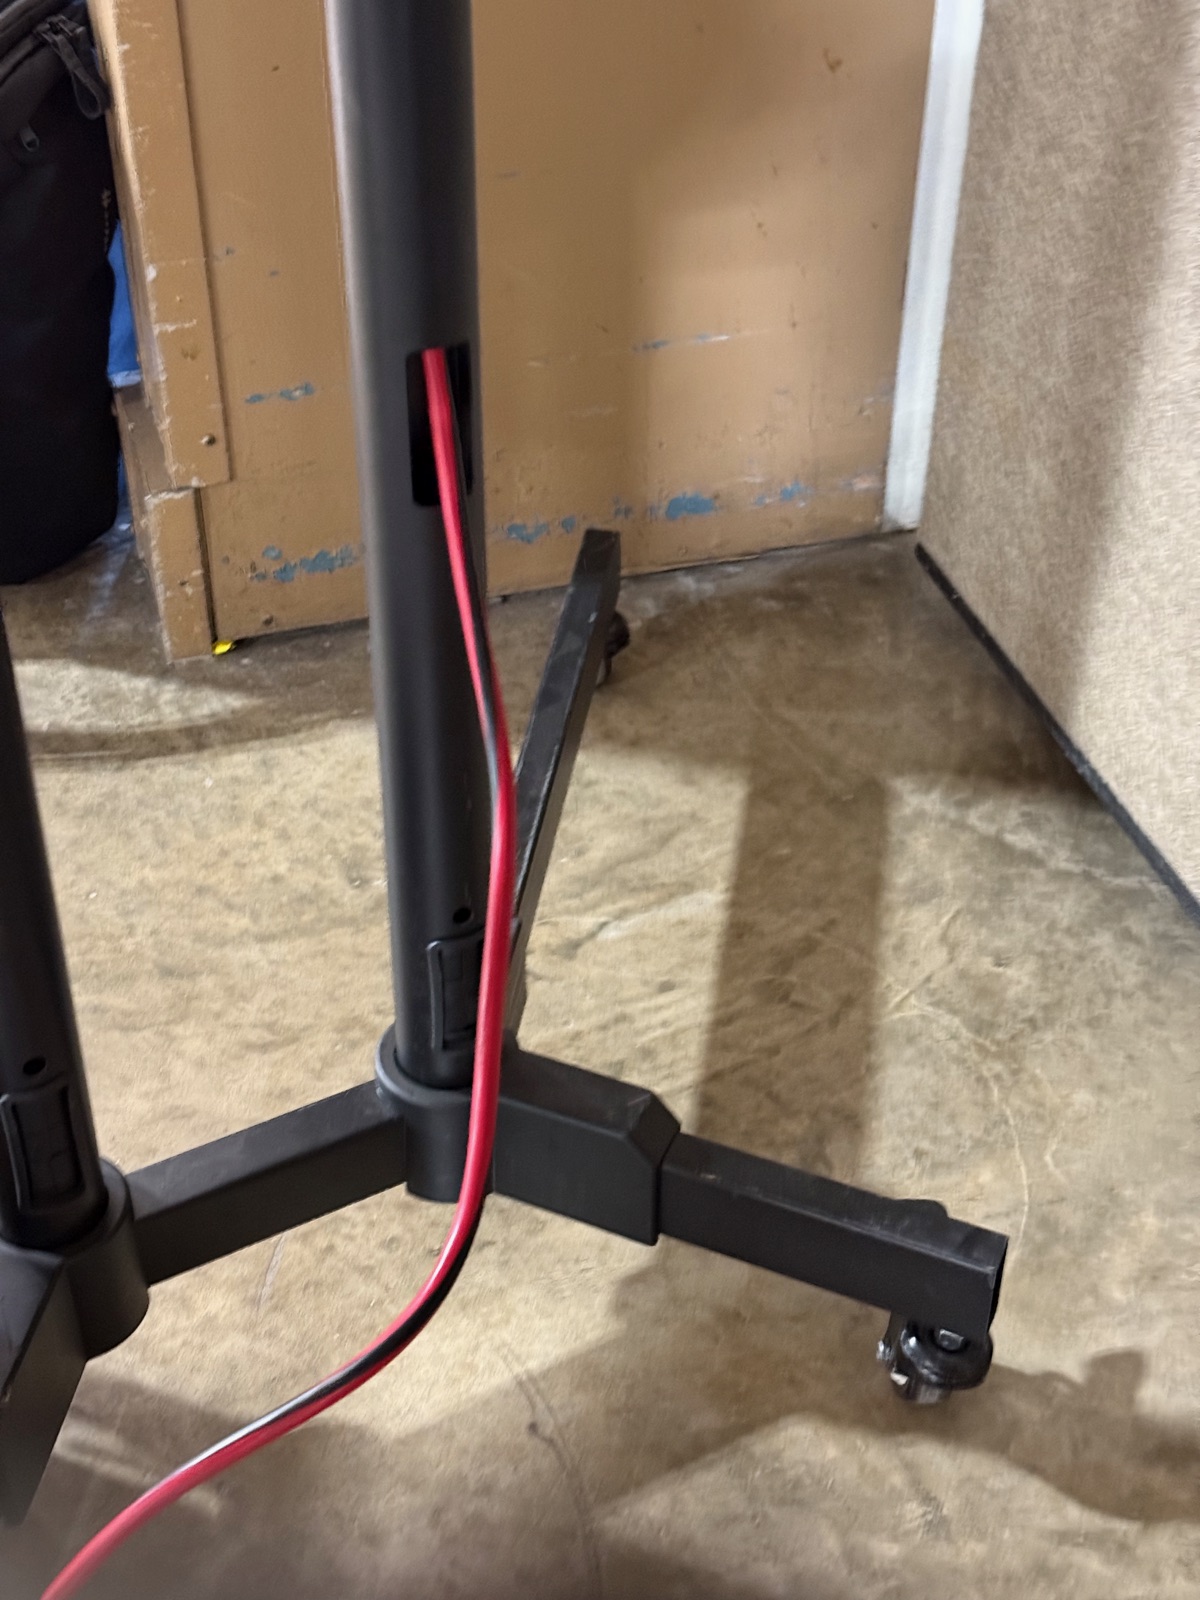
1. Position stand and TV, secure TV to mount
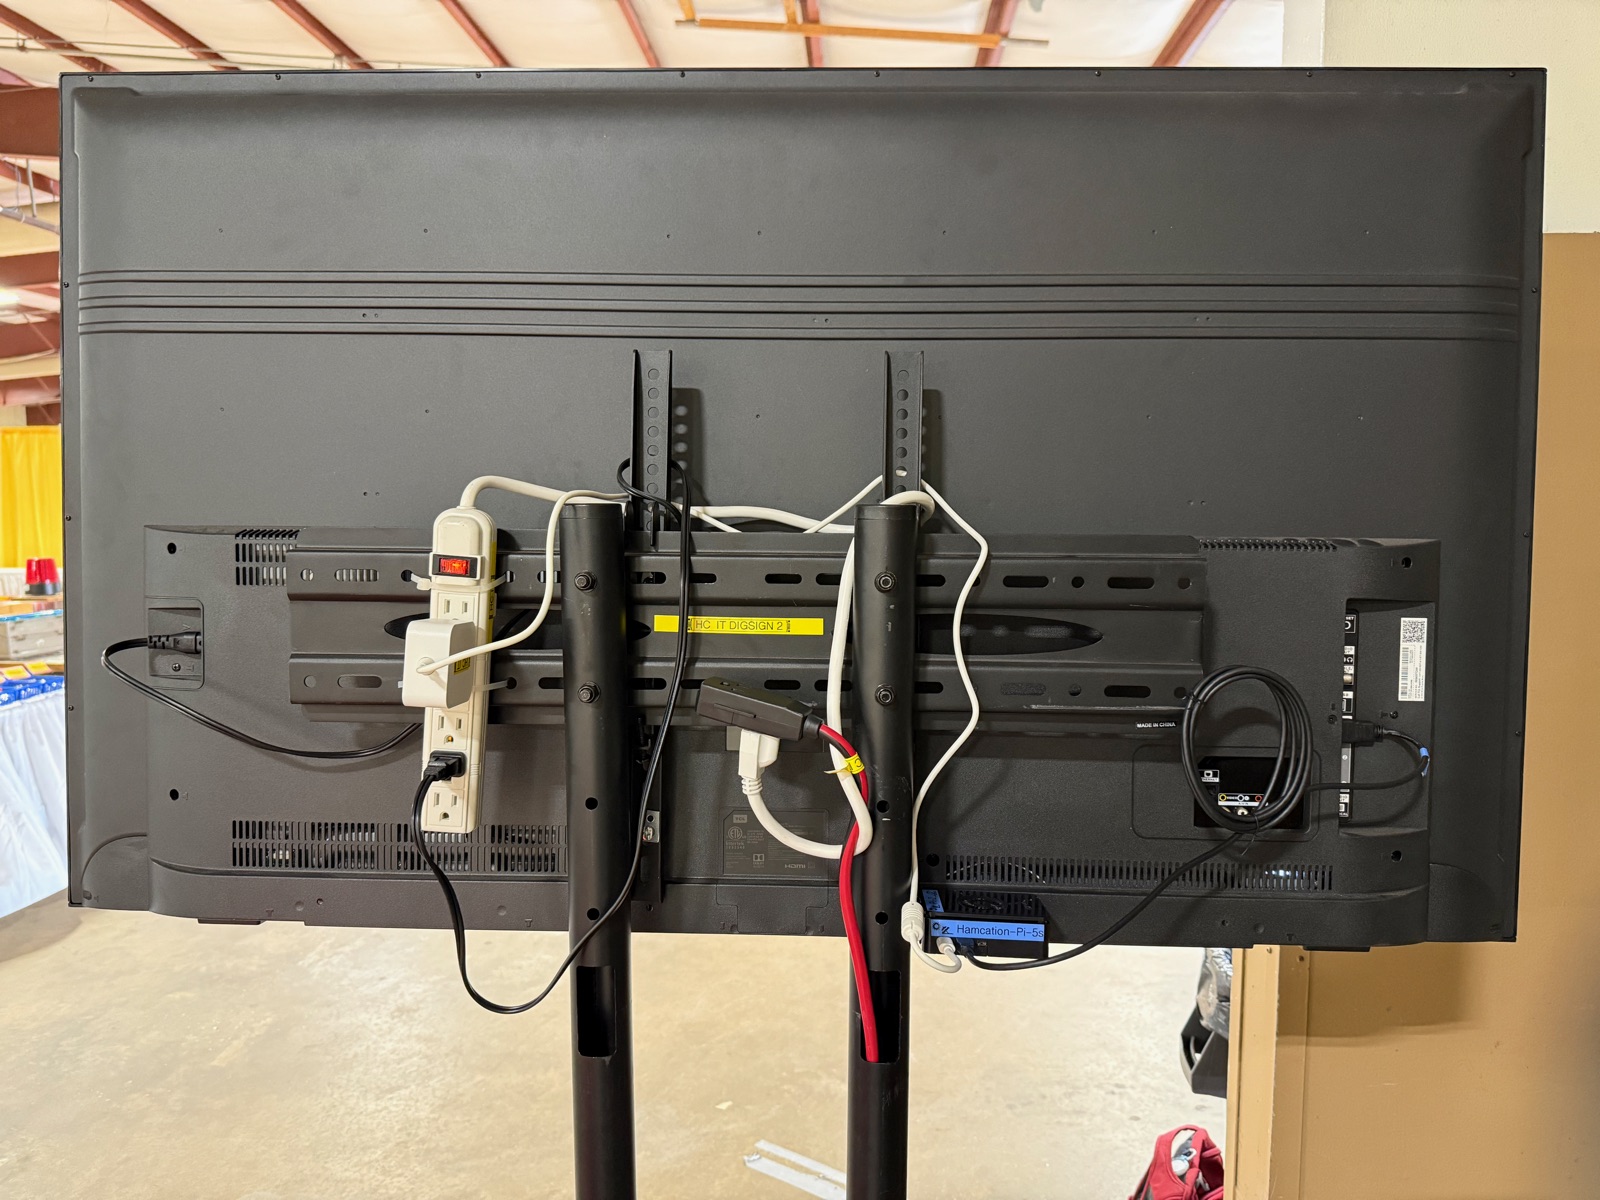
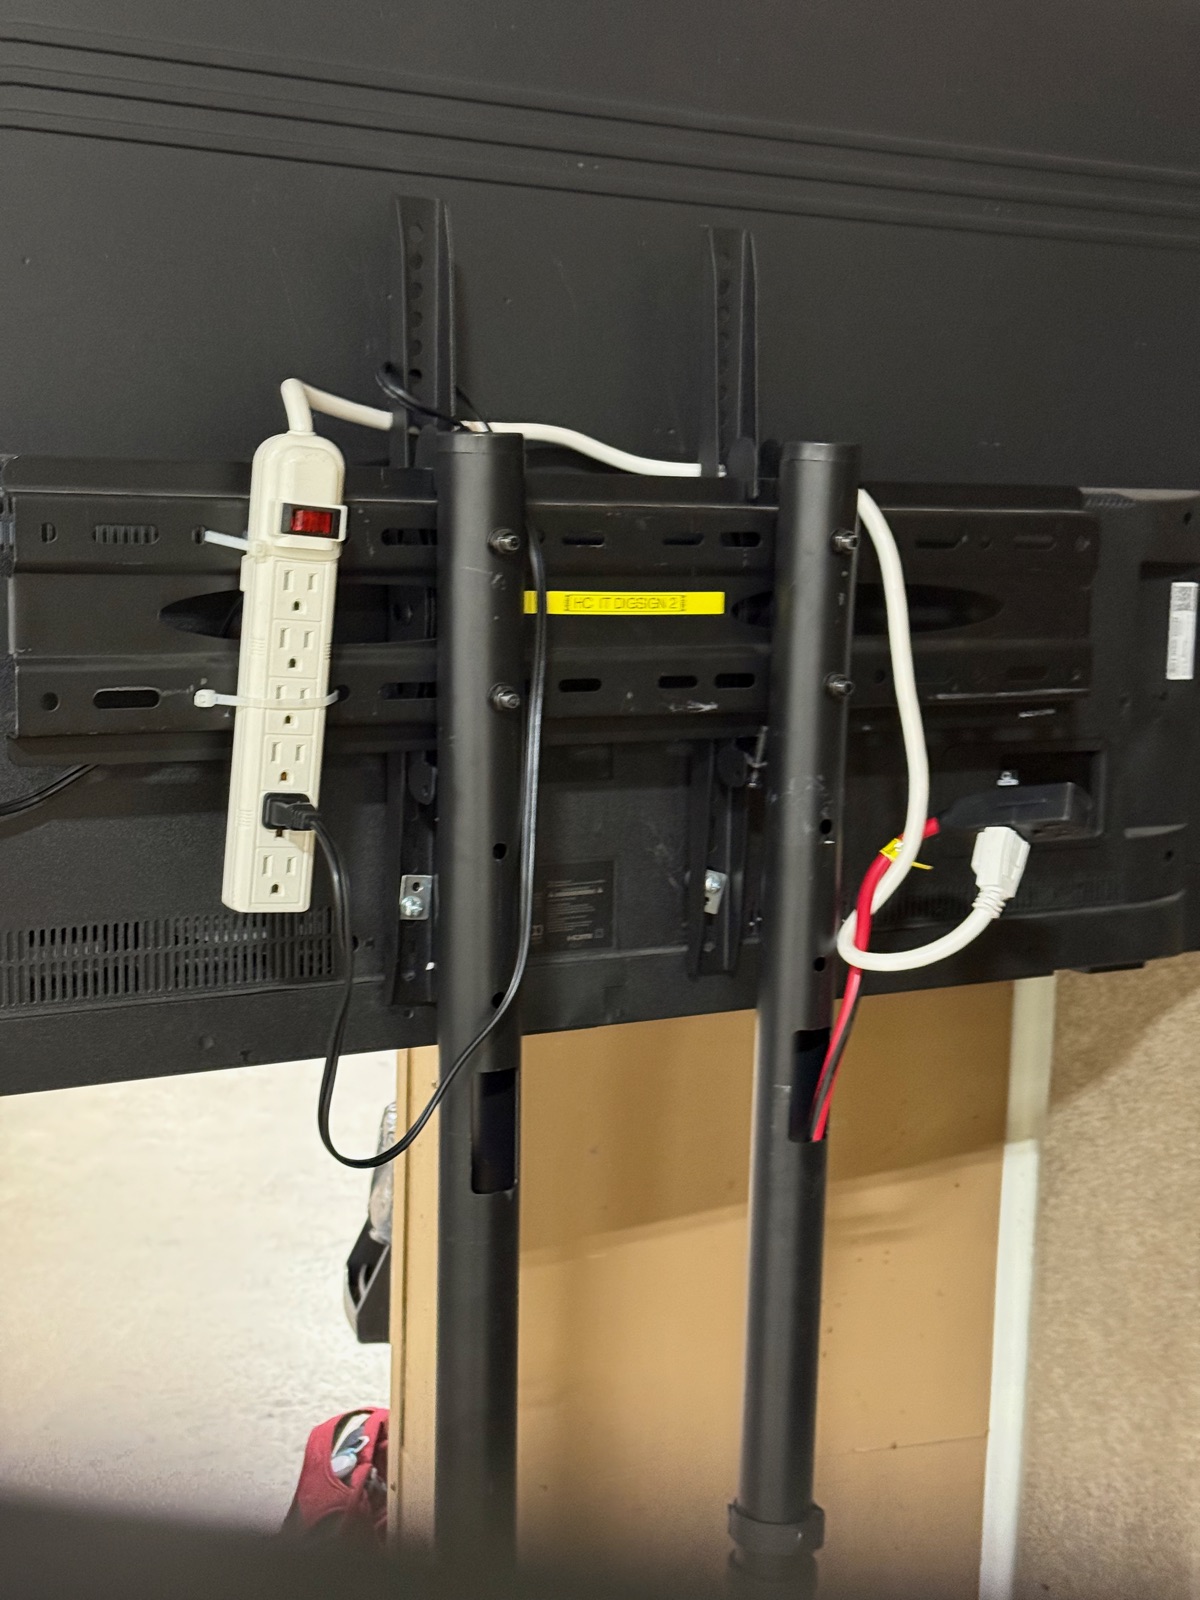
Route the extension cord up through the stand pole to keep cables tidy.
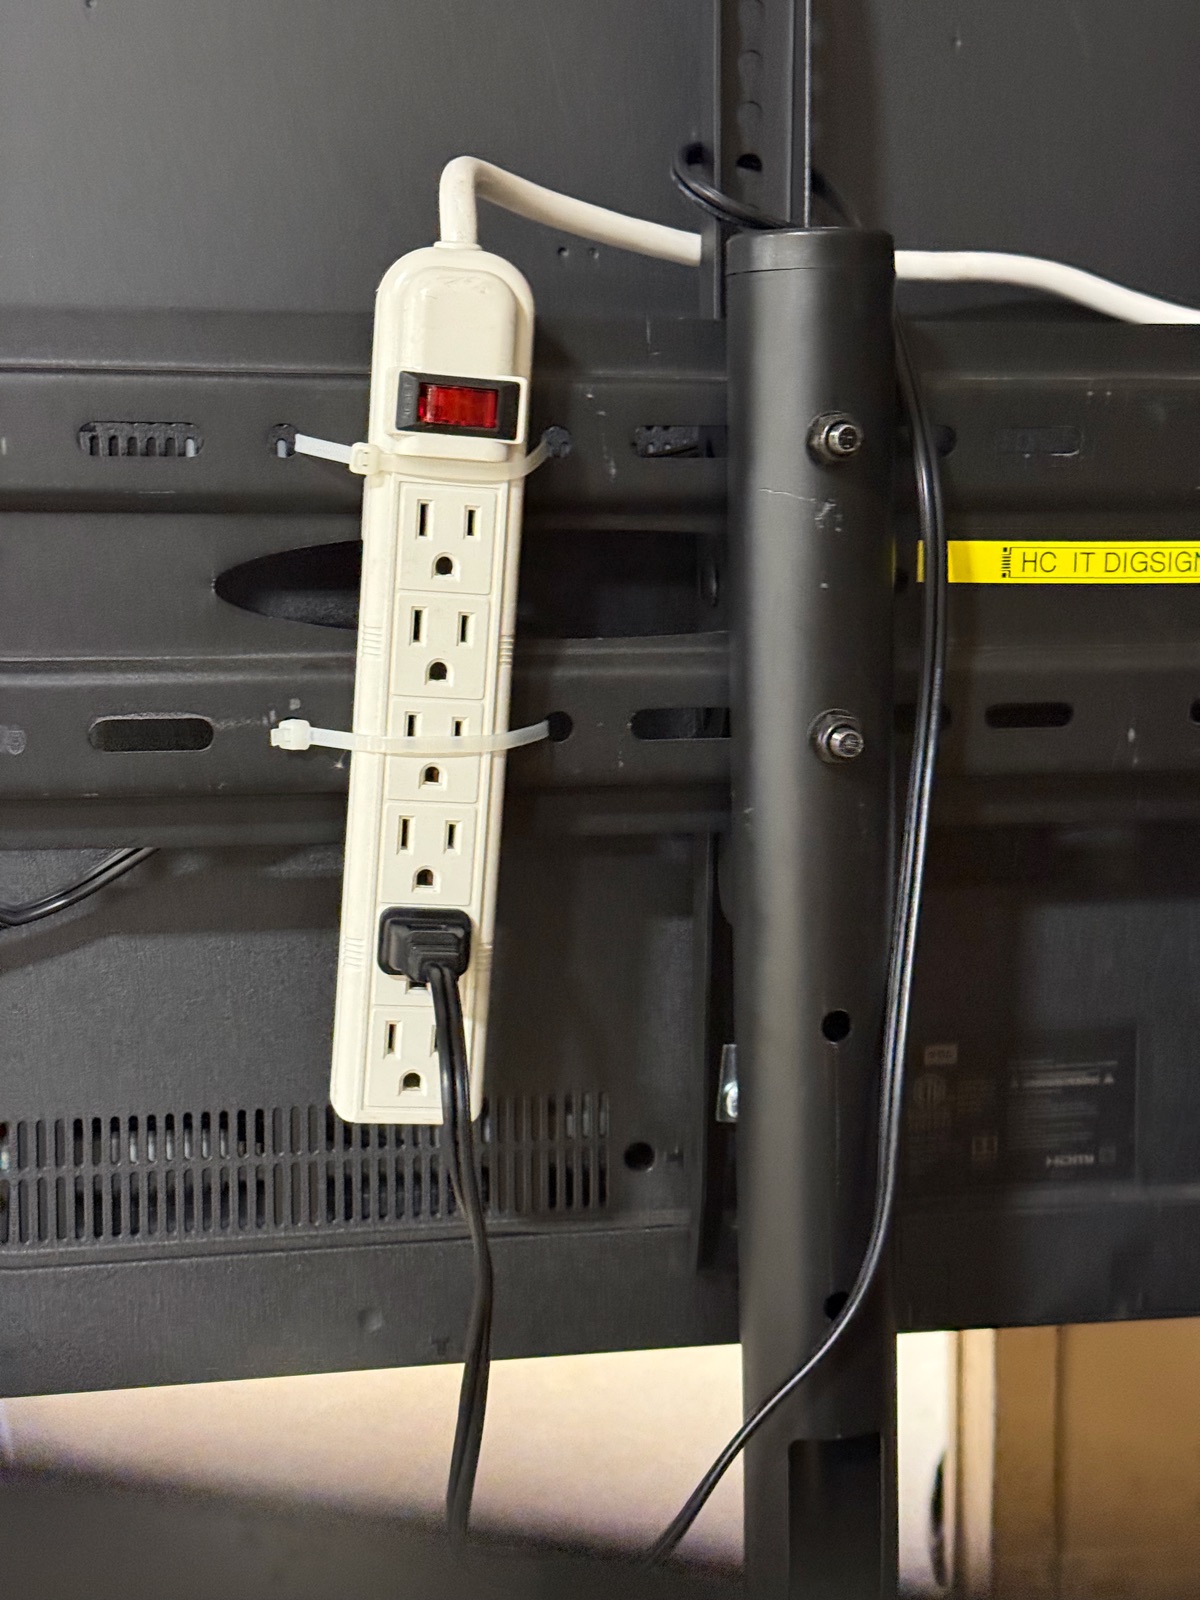
2. Run extension cord, connect power strip
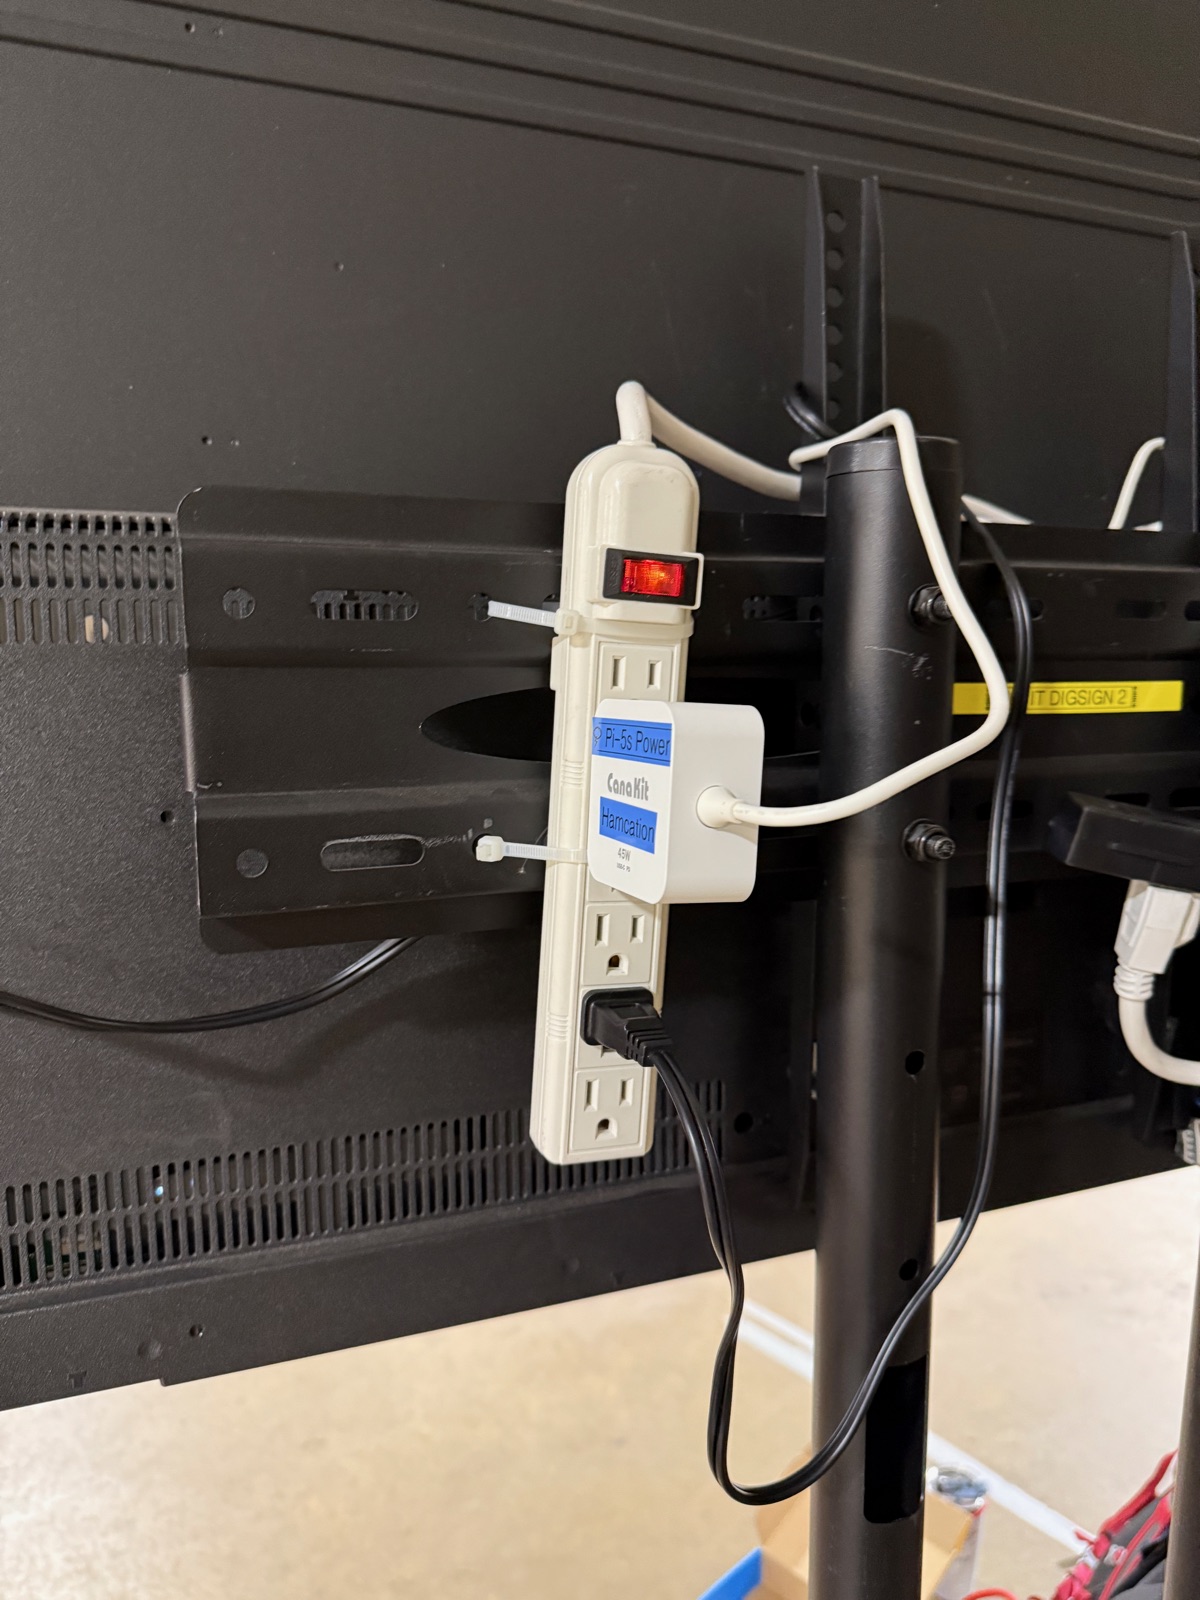
Zip-tie the power strip to the stand behind the TV. Plug the TV power cable into the strip.
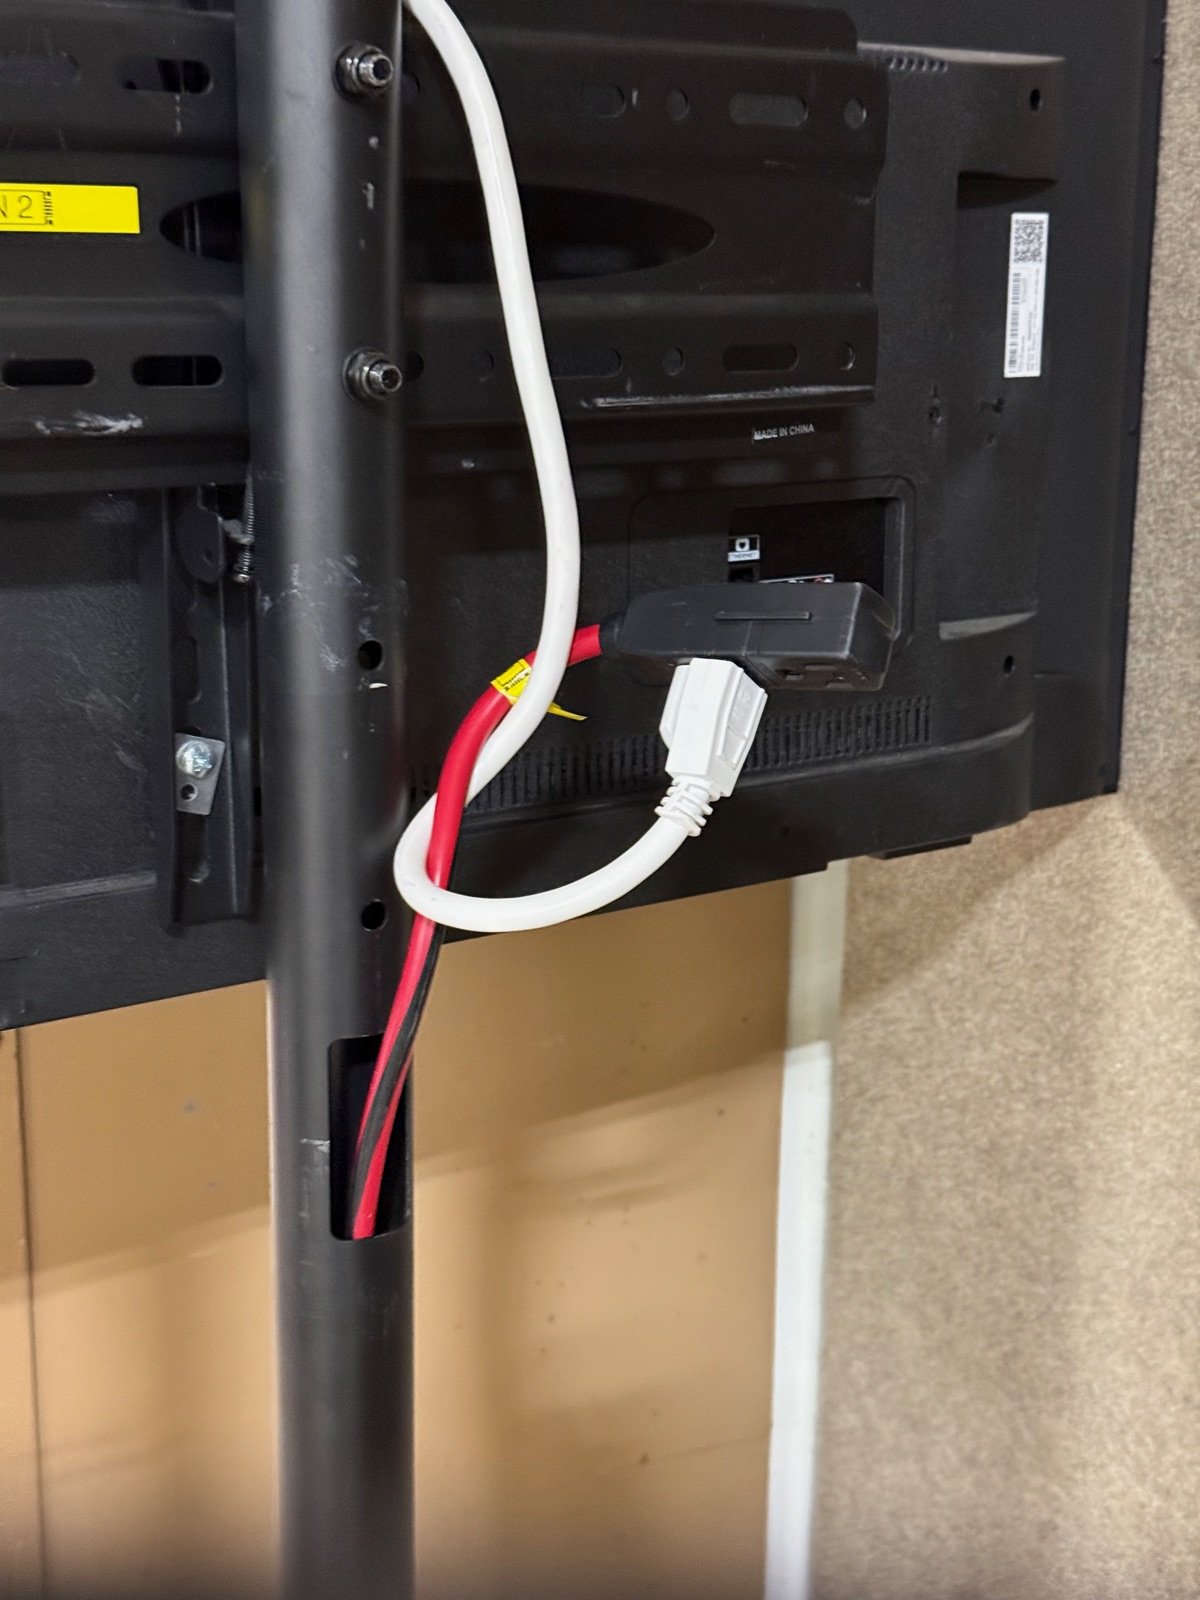
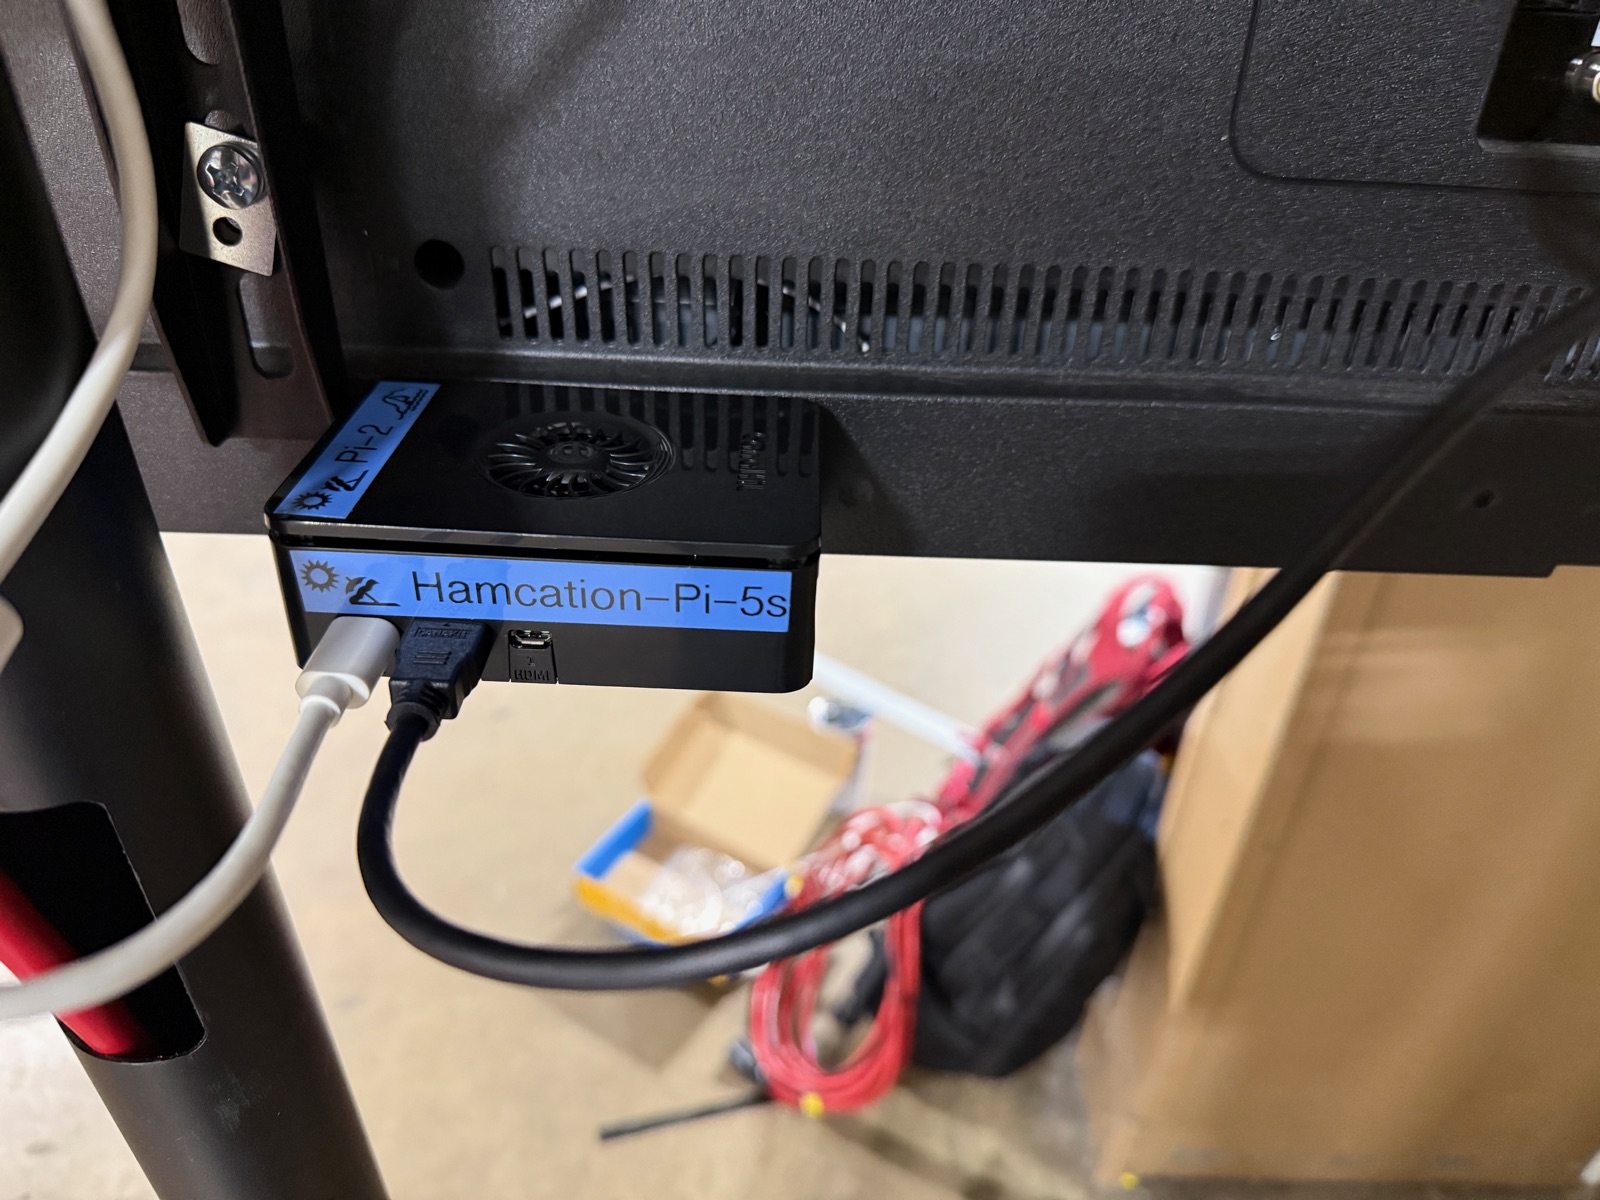
3. Mount Pi to back of TV, connect HDMI and Ethernet
The Pi mounts to the back of the TV near the bottom edge. Connect HDMI and Ethernet before powering on.
4. Connect Pi power last
Plug the Pi power supply into the power strip. Always connect power last to avoid boot issues.
5. Turn on TV, select HDMI input
6. Wait for boot, verify PRInfo content displays
Once complete, the back of the TV should look like this — all cables routed cleanly with the Pi, power strip, and connections secured.
GL-iNet KVM (PRInfo 1 Only)
A GL-iNet KVM is installed inline at the Prize & Info booth for remote access to PRInfo 1. It sits between the Pi and the TV, passing HDMI video through while providing remote KVM access over WiFi.
TODO: Add photos of GL-iNet KVM installation (inline cabling, power connection, mounted position).
The KVM must be powered on for HDMI passthrough to work. If the KVM loses power, the TV will show “No Signal” even though the Pi is running. Always verify KVM power if PRInfo 1 goes blank.
Connection order: Pi HDMI out → KVM HDMI in → KVM HDMI out → TV
- Connect Pi HDMI output to KVM HDMI input
- Connect KVM HDMI output to TV
- Connect KVM USB to Pi (for keyboard/mouse control)
- Connect KVM to power strip (required for HDMI passthrough)
- KVM connects to network via WiFi (no Ethernet needed)
- Verify KVM is reachable at glkvm.degu-decibel.ts.net via Tailscale
- Verify TV displays PRInfo content (passthrough working)
TV Configuration
TVs should be pre-configured for signage mode:
- Only HDMI 1 input enabled
- Screensaver disabled
- Speakers disabled
- Power-on set to “Computer” input
- CEC 1-touch play enabled
Display Resolution
HDMI output is locked to 1920x1080 at 60Hz on all Raspberry Pis. This is set automatically by the kiosk startup script using wlr-randr before Chromium launches — no manual configuration needed.
The TCL 55” TVs support 4K but the Pis default to 3840x2160@30Hz which is sluggish for a kiosk. Forcing 1080p@60Hz gives smoother rendering with less GPU load.
If a display appears at the wrong resolution after a fresh OS install, redeploy the kiosk role:
ansible-playbook playbooks/site.yml --limit prinfo1 --tags kioskTroubleshooting
| Problem | Solution |
|---|---|
| Blank display | Check power, cycle TV inputs |
| ”No Signal” | Check HDMI cable, verify Pi has power |
| Pi boots, no content | Check network connection |
| Network not connecting | Check Ethernet cable, verify drop is active |
| KVM unreachable | Check KVM power and WiFi connection, verify Tailscale connectivity |
| KVM shows black screen | Check HDMI from Pi to KVM input, verify Pi is running |
| TV blank but KVM works | Check HDMI from KVM output to TV |
| TV “No Signal” but Pi is fine | Check KVM power — HDMI does not pass through without power |